How to...
The Aeropress is a wonder of modern coffee innovation. It’s a simple gadget that makes world-beating coffee in a couple of minutes.
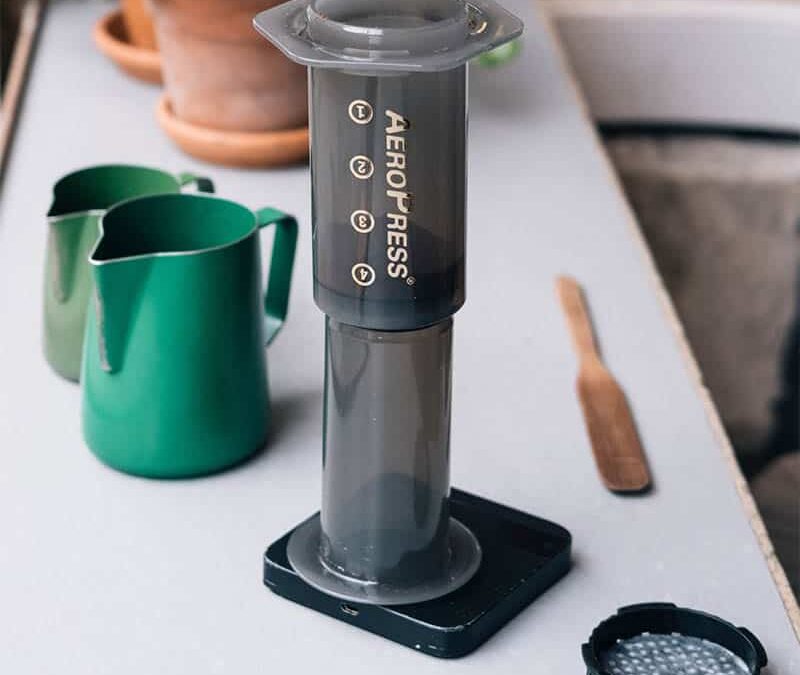
Five simple parts: a plunger, a chamber, a micro-filter, a filter cap, and a stirrer.
It was invented by an American chap called Alan Adler, a Stanford University engineer who also likes to design frisbees and nuclear reactors (quite a clever bloke, really). Aeropress flew under the radar for a while, until it went, well, nuclear – now with over a million sold in over 60 countries.
The gizmo itself is light, durable and easy to clean, so it’s perfect for chucking in a backpack and taking on a camping adventure. Or if you want to escape to the shed for some alone time. Or take it to work. Or use it every day. Up to you…
There’s been some confusion about what kind of coffee the Aeropress produces. It doesn’t make espresso, but instead, what comes out is a smooth, rich brew that’s like a strong filter coffee (as it uses a filter), and can have hot water added to make an Americano-style drink. The microfilters prevent gritty bits from ending up in the brew (make sure you get official filters, too – cheap ones can filter out the best flavours if they’re too thick to let the good stuff through).
It’s really easy to use, and if your guests haven’t seen one before they’ll think you’re a total coffee wizard. You can nerd out with Aeropress and tinker with experimental methods to your heart’s content (the fact that there are World Aeropress Championships tell you all you need to know). And it’s one cup at a time – which means less waste and more chance to try out different methods.
How do you use an Aeropress to make the best coffee? Read on and we’ll tell you
If you’ve ever wondered what grind you should use with an Aeropress, fear no more.
A medium grind is the best choice here, so it doesn’t slip through the filter. At Neighbourhood we make speciality Aeropress grinds of our coffee range, so you’ll never be in doubt, but grinding fresh is ALWAYS best.
Lay out your bits – plunger, chamber, filter, filter cap, stirrer and your favourite cup or mug.
Rinse your filter paper with hot water (with it sitting in the plastic cap – not your fingers!) This helps the filter stick to the cap.
Experts recommend filtered water. You may be able to get away with tap water, at least if you’re in the North (!) but for the perfect cup, filtered is the way to go. You should fill that cup with a splash or two of hot water to pre-heat it, as pouring hot coffee into a cold cup will mean it cools quicker, which isn’t ideal.
If you’re using a kettle, switch it off before boiling point, or leave it to cool for a minute or two if it’s gone all the way. The ideal temperature is 85°C -90°C, if you’re measuring.
Pour the water in slowly. Reaaaally slowly. If you can eke it out to 30 seconds, you’re officially a pro.
Then stir. In the words of Lukas Zahradnik, winner of 2015’s World Aeropress Championship – give it a ‘turbulent wiggle’
For 30 seconds or so. Add a splash more water if you’re feeling generous.
Press the plunger, slowly and smoothly, and watch the flavoursome brew fill up your cup. Remove the gadgets and stare lovingly at the masterpiece you’ve just created. It should smell pretty gorgeous, too.
You can then augment it with hot water (Americano style) or a milk / dairy alternative, if you feel.
And there you have it! You’re ready to impress with your Aeropress. Save a cuppa for us, yeah?