How to...
A classic method for brewing tasty coffee, filter is a sure-fire way to get a smooth and highly drinkable cup of the good stuff, with minimum fuss.
Quality can range all the way from bland and stale to award-winning, rich, smooth deliciousness. It’s all in the technique (and having the right tools and beans to begin with).
Making filter coffee involves a few simple steps (pour hot water over coffee, through a filter, into a jug). There’s the commonly known drip coffee, which usually involves an electric machine, with a timer that automatically starts the brew, and keeps the pot warm on a hot plate, so folks can come back for more throughout the day. You’ll most likely see them in aeroplanes, hotels, and other public places.
We like to focus on the pour-over method, which is a more manual style of brewing involving hand-pouring water through coffee and a paper filter. It allows for much better control over the amount of coffee and the overall result.
There are three different bits of kit we prefer to use for our filter coffee, Chemex, Hario & Fellow
A Chemex is a gorgeous glass pour-over flask, invented in the 1940s by Peter Schlumbohm, an enterprising chemist in the United States.
It’s recognisable by the wooden neck collar with dangling leather tie attached. It’s a handsome piece of kit and is famously the coffeemaker of choice for James Bond, getting a mention in From Russia, With Love.
Chemex filters are also the brainchild of Dr. Schlumbohm, a special thick filter paper that prevents oils from the grounds getting through into the jug, and encourages ‘blooming’ – we’ll come to that in a moment.
This petite beauty is a simple device that can filter coffee directly into a cup, ready to drink – rather than a jug (although servers are available if you’re making for two). It’s great for experimental brewing that brings out different flavours depending on which method you use.
The V60 was invented by the distinguished Japanese manufacturer Hario, who initially made glassware for science labs – so you know they know their stuff.
There are plastic, ceramic and metal varieties, with special ridges in the funnel that let air flow through for a smoother extraction.
The differing filters of the various brewer types can lead to different tastes, so we encourage you to experiment until you find a method that works best for you. The entire process takes 3-4 minutes with each.
Fellow are a bunch of US-based coffee & design nerds, who are constantly pushing the envelope when it comes to brewing equipment.
Their X & XF pour over drippers are steep-sided, flat-based, and built of vacuum insulated double-walled stainless steel. They look as good on the kitchen counter as they do when you’re brewing with them.
Fold it into a cone shape, place it inside the dripper. Moistening it ensures the filter stays in place as it should, and gets rid of any papery taste. Remember to discard the rinsing water!
The origin and blend, of course, is yours to choose. In terms of grind – filter coffee is works best with a medium grind, although for a Fellow or a Hario, we recommend grinding a little finer than a Chemex.
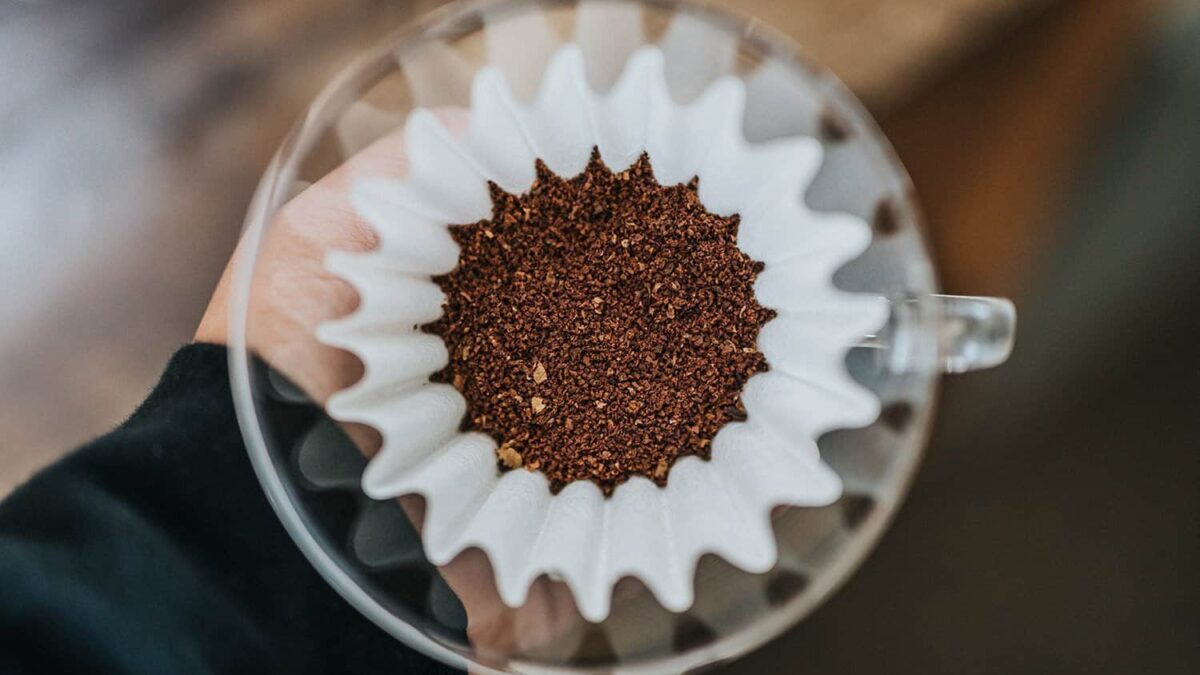
Measure out 60 grams of coffee for every litre of water. Obviously, if you’re only using 250ml of water, that’s 15g of coffee, and so on. If you don’t have scales then Hario brewers come with a scoop to give you an idea.
Freshly ground is always best, so if possible, grind just before you brew. Add the coffee to the brewer, making sure the bed of coffee is level. If you wish, you can make a small divot in the middle to help with wetting the coffee.
Filtered water is your best option, to prevent any minerals contaminating the taste, but if tap is the only option, that’s fine too. If we’re being specific, aim for 90°C to 95°C, or a kettle that’s been let off the boil for 20-30 seconds.
Leave it for 30 seconds, for the bloom to dissipate, then pour continuously in small circles around the centre of the dripper, keeping the water level steady. Get as much of the water as you can in – this means a higher brew temperature and plenty of delicious extraction. Give it a little stir, to make sure no coffee is left high and dry.
Once your cup or jug is nearly full, you’re done. Easy as that.
We would always drink it black, but of course it’s up to you.
@neighbourhoodcoffee Our top tips to brew better filter coffee #filtercoffee #pourover #v60 #coffee #coffeelovers ♬ Calabria (feat. Fallen Roses, Lujavo & Lunis) – Dance Fruits Music & DMNDS